Thumbs, Gestures, and Other Tips
Marty and I were having a recent “on-line water cooler” type of discussion. We do that a lot when we are working. After all, we live thousands of miles apart. So when we collaborate, we also catch up on the latest personal or family news as well.
Now Marty is always sketching while we talk on-line, as you may have gathered from all of his scribble drawings that I use here in the blog. So as usual we were discussing “shop talk” related to our animation productions, and we began to comment on some of the misconceptions that are inadvertently created by most published works relating to drawing and animation.
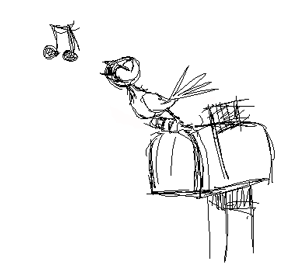
For example most books written about drawing and animation tend to only show finished examples. We decided it was a cost of publication restriction, but none the less, it creates the false impression with many readers that drawing for animation is a one step process as far as those nice clean finished drawings. I’m am often surprised at how many people think that cartoonists only draw in these clean thick and thin flowing lines. They are only being shown the finished drawings so they just assume that these lines are how the artist started and finished. Of course that’s a misconception. Depending on the artist there are usually many steps between the concept and the realization of a drawing or animated sequence. Unfortunately, examples of most of these steps don’t get published even though they exist.
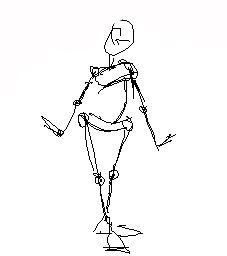
Thumbnail drawing, gesture drawing and rough sketching are so important to the process of animating and yet so often rarely emphasized in texts that introduce new artists to animation work. This misconception carries over into many aspects of the work.
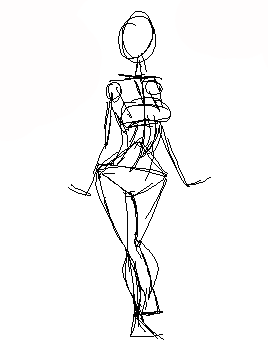
I find that not only do beginning students not understand how to draw loose feathering lines made up of tiny short strokes but they also try to animate starting with finished drawings. I often refer to this as the “snapshot” approach to animation. Many people see examples of animation work in books which are a series of finished drawings that make up a sequence of action. They already have the normal perspective, from childhood learning, that drawings are still pictures or “snapshots” like photographs, so it is natural to view animation as a series of snapshots.
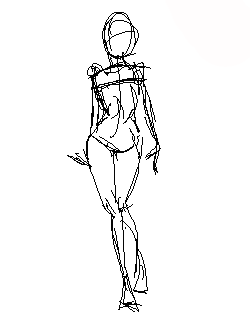
So the novice assumes that to animate they need to produce a finished frame, and then do the next frame to completion and then do the next frame and so on. Now they occasionally stumble on discussions of straight ahead versus pose to pose animation so they do sometimes at least think about the differences in those fundamental approaches. But basically the thought process is to finish each frame before doing the next frame. Some people even paint in the colors before moving to the next frame. That is sure to kill any spark of life in your work. The rush to have a finished product is a strong urge that should be avoided.
The result of this snapshot approach is stiff, low energy work. Most people blame their results on their lack of drawing skills. But I think they just don’t give themselves a chance because they are laboring under such misconceptions.
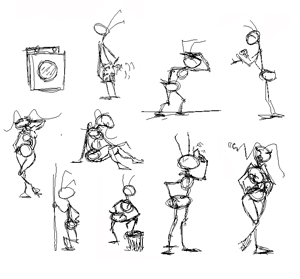
Here are a few suggestions that might help you get more out of your animation work. First, forget finished drawings and focus on learning to sketch loosely in a more gestured or thumbnail style. Second, start thinking about animation as art across time and not as a series of snapshots. Learn to work back and forth across the frames. Your goal is to capture rhythm in motion so working back and forth using the instant testing and viewing capabilities of your software to flip your drawings is a great advantage. Professional animators are constantly flipping back and forth checking the action and making adjustments.
Besides learning to work back and forth across a series of frames, it is also important to not worry about the finish quality of your drawings, but to stay loose and forget about a lot of details. You want to capture the energy and rhythm of the action. There is plenty of time to clean it up and layer in the details after you get the business worked out. We like to do just rough thumbnails for the most part. That way we don’t have a lot of time and effort invested in the work and therefore we find making changes less painful. The more finished your work the less you will want to try different views or angles and the stiffer your results. The looser and more gestured your work the more you will try stuff and the better your results will be.
Marty Says "Hello"
Now Marty is always sketching while we talk on-line, as you may have gathered from all of his scribble drawings that I use here in the blog. So as usual we were discussing “shop talk” related to our animation productions, and we began to comment on some of the misconceptions that are inadvertently created by most published works relating to drawing and animation.

For example most books written about drawing and animation tend to only show finished examples. We decided it was a cost of publication restriction, but none the less, it creates the false impression with many readers that drawing for animation is a one step process as far as those nice clean finished drawings. I’m am often surprised at how many people think that cartoonists only draw in these clean thick and thin flowing lines. They are only being shown the finished drawings so they just assume that these lines are how the artist started and finished. Of course that’s a misconception. Depending on the artist there are usually many steps between the concept and the realization of a drawing or animated sequence. Unfortunately, examples of most of these steps don’t get published even though they exist.

Thumbnail drawing, gesture drawing and rough sketching are so important to the process of animating and yet so often rarely emphasized in texts that introduce new artists to animation work. This misconception carries over into many aspects of the work.

I find that not only do beginning students not understand how to draw loose feathering lines made up of tiny short strokes but they also try to animate starting with finished drawings. I often refer to this as the “snapshot” approach to animation. Many people see examples of animation work in books which are a series of finished drawings that make up a sequence of action. They already have the normal perspective, from childhood learning, that drawings are still pictures or “snapshots” like photographs, so it is natural to view animation as a series of snapshots.

So the novice assumes that to animate they need to produce a finished frame, and then do the next frame to completion and then do the next frame and so on. Now they occasionally stumble on discussions of straight ahead versus pose to pose animation so they do sometimes at least think about the differences in those fundamental approaches. But basically the thought process is to finish each frame before doing the next frame. Some people even paint in the colors before moving to the next frame. That is sure to kill any spark of life in your work. The rush to have a finished product is a strong urge that should be avoided.
The result of this snapshot approach is stiff, low energy work. Most people blame their results on their lack of drawing skills. But I think they just don’t give themselves a chance because they are laboring under such misconceptions.

Here are a few suggestions that might help you get more out of your animation work. First, forget finished drawings and focus on learning to sketch loosely in a more gestured or thumbnail style. Second, start thinking about animation as art across time and not as a series of snapshots. Learn to work back and forth across the frames. Your goal is to capture rhythm in motion so working back and forth using the instant testing and viewing capabilities of your software to flip your drawings is a great advantage. Professional animators are constantly flipping back and forth checking the action and making adjustments.
Besides learning to work back and forth across a series of frames, it is also important to not worry about the finish quality of your drawings, but to stay loose and forget about a lot of details. You want to capture the energy and rhythm of the action. There is plenty of time to clean it up and layer in the details after you get the business worked out. We like to do just rough thumbnails for the most part. That way we don’t have a lot of time and effort invested in the work and therefore we find making changes less painful. The more finished your work the less you will want to try different views or angles and the stiffer your results. The looser and more gestured your work the more you will try stuff and the better your results will be.

Marty Says "Hello"

2 Comments:
JK, this is *such* a helpful post for a beginner like me. I've printed it out to read and concentrate on. This is a good example of how self-teaching animation is slow and really difficult - you don't have an instructor pointing to your drawings saying "how'd you get there?" and "that needs more bounce!". I've read a lot of art books where I struggle to find out how I should be using it. Trace the drawings? Copy them freehand? Just stare and hope for osmosis?
I've found that working in Flash is a double-edged sword for me. It's wonderful for moving frames around, getting instant feedback, and creating web-ready output. But it's hard for me to get the loose, sketchy feel you mention, even with my Wacom tablet. It's also very easy to be undisciplined and go straight to a cleaned up drawing. I should probably be using paper and pencil right now (I do have a lightbox) but scanning the animation into the computer for viewing seems *very* time-consuming.
But I digress. Thank you for sharing your knowledge and observations.
Jimmy,
If you have Flash 8, I believe it has a feature called object drawing mode. The keyboard short cut is [J]. This is great for sketching because it keeps your drawing lines from merging. I prefer sketching with the brush tool and a trick I've learned is to set your paint fill color to a red or blue that has its alpha value set at say 50%. This lets you see lines through lines.
I often rough sketch in red and then go back over it with blue just for the best lines.
I'm glad this article was helpful for you. Keep up the great work.
Post a Comment
<< Home