It is suggested that you read Part 1 before proceeding if you haven't read it previously.
This is a continuation of a series aimed at exploring some of the fundamental concepts behind how Toon Boom Studio is organized. From my experience helping many people to use TBS, I have learned that understanding the metaphor behind the environment and how that metaphor evolved from traditional 2D hand drawn and photographed animation really helps in the learning process.
The basic development environment of Toon Boom is structured around a hierarchy of computer files grouped together in an “animation project”. Even that metaphor is evolved from traditional animation. In the making of cartoons traditionally, there are many documents and artwork assets that have to be very well organized and able to travel through the production workflow in scene folders etc. So the TBS evolution of organizing and containing our cartoon making materials is the TBS animation project. Every cell is a file and those files are stored in folders by element type and separated into scene folders
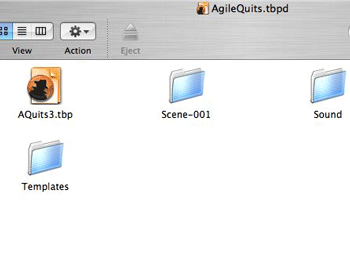
Inside a TBS animation project folder
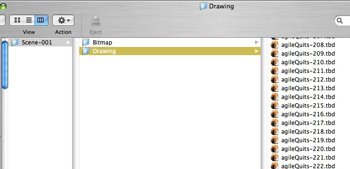
Inside a scene folder
TBS animation projects have timelines and exposure sheets, one of each attached to each scene. Traditional 2D photographed animation just uses exposure sheets. Each scene’s timeline and exposure sheet in TBS are fully integrated and work together. A TBS exposure sheet, like a traditional one, has rows and columns. The rows are representational of frames also referred to as exposures. (This is traditional animation terminology relating to a frame of film which is also a photographic exposure.) The columns are representational of elements which are the TBS equivalent of layers stacked under a photographic animation camera on a rostrum stand. ( review Part 1) The TBS timeline has rows and columns. The rows are representational of elements ( the layers) and the columns are representational of frames ( film exposures). The rows of the timeline are often referred to as “tracks”.
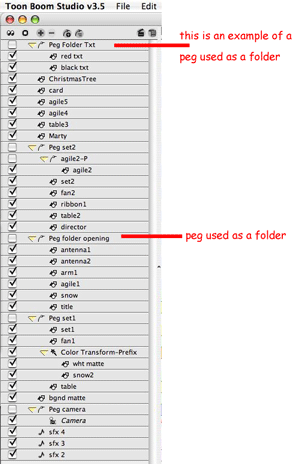
Timeline layering in TBS is from the top down as listed vertically. So elements at the top of the timeline are closer to the viewer and elements at the bottom of the timeline are farther away from the viewer. Layering in the exposure sheet is from the reader’s left to right. (This is a change from earlier versions of TBS which were ordered from right to left). So elements on the exposure sheet which are on the reader’s left are closer to the camera then columns (elements) to the right.
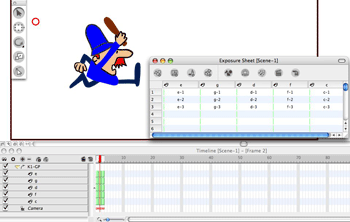
One interesting difference in TBS is that you can designate a “positioning” type for an element that will establish it as a “foreground” or “background” element or just a “normal” element. (Elements are “normal” by default.) Foreground elements are automatically seen in front of other elements and background elements are automatically behind other elements, although there can still be hierarchical layering in the foreground “group” of elements and in the background “group” of elements. Again this hierarchy is based on each group member element’s relative position with respect to other member elements of the same “positioning” type in the timeline and the exposure sheet. So some foreground elements can be positioned to display in front of other foreground elements and the same for background elements overlapping other background elements. Normal elements fall in between foreground elements and background elements for viewing.
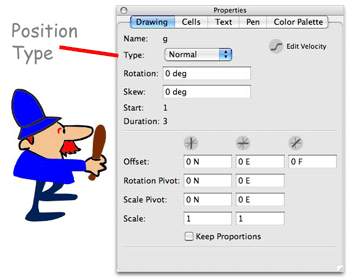
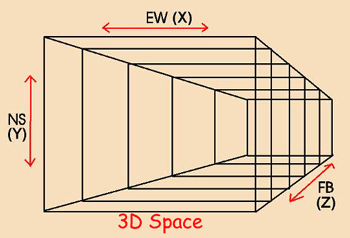
(The use of virtual 3D space is also important to understand, but we will get to that later.)
The Exposure Sheet and the Timeline
The exposure sheet in TBS evolved from the exposure sheet used in photographed animation which is also often referred to as a “dope” sheet. (To “dope” something out is a slang expression for communicating and organizing information) There are many similarities between the TBS exposure sheet and it ancestor. Traditionally the exposure sheet moved from step to step throughout the animation production workflow as an organizational, instructional and coordination and control document. It started its life with the director and worked its way through the process to the camera person and the post production editor etc. So the traditional exposure sheet was really the heart of the animation workflow in terms of facilitating collaborative exchanges and directions. I won’t elaborate on all the traditional uses of the exposure sheet (X-sheet) but I will discuss some of them here. Why? Because the timeline that evolved in 2d animation software like TBS was created to handle some of the prior aspects of the exposure sheet. Many people wonder why does TBS have both an exposure sheet and a timeline and before you finish reading this article you will know the answer.
Click here to view a example of a traditional Exposure Sheet
Here is a partial list of functions that were carried out through the traditional x-sheet:
Establish the flow and timing of the entire cartoon
Sound track breakdown by frame
Direct the creation of the actual animation
Order of cell layers from top to bottom by frame
Cell usage and exposure by layer by frame
Thumb nail sketches, notes, and ideas for actions by frame
Camera field size and movement instruction by frame
Transition effects by frame
Pantograph instructions and registration peg bar movements by frame
Now let’s take each of the functions on the list and see how this important function is implemented in TBS either through the exposure sheet or the timeline.
Establish the flow and timing of the entire cartoon
In traditional cartoon making after the story has been conceived, dialog written and storyboards and layouts have been made, the cartoon’s director would break the production work into scenes or parts of scenes and folders would be prepared to organize the assets to travel through the workflow. The director would make conceptual pose drawings and key drawing and also would make notes and establish the scene timing on exposure sheets for each folder. Thus the X-sheets became a major part of the “blueprints” for constructing the cartoon.
Sound track breakdown by frame
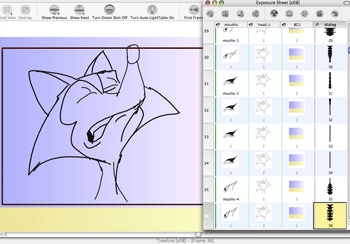
After the sound track, particularly the dialog had been recorded and before any animation began, the scene folders containing the X-sheets would move to track reading where very skilled individuals would breakdown the sound elements and add this information on to the X-sheets to identify how the sound track would map to the action frame by frame. Often there would be additional directorial notes added after track reading to emphasize important points that the director wanted to be included in the animation related to acting or synchronization.
Order of cell layers from top to bottom by frame
Layers were even more critical in photographed animation because their total number had to be restricted usually to 5 and controlled and accounted for due to optical considerations. Even the thinnest cells although transparent still diffused and altered light and the same shade of a color appears differently depending on how many layers are stacked. So a shade of red on the top layer looks different from that identical shade of red on the second or third or forth layer of the stack. Paint actually had to be mixed to compensate for the layer on which the shade of the color would be used. Fortunately this restriction on total layers and optical diffusion of colors is not an issue in computer rendered animation. So the ordering of layers is just a matter of picture composition today. The exposure sheet in TBS is the starting point for creating and ordering elements. Most composition issues arise in camera view so final layer ordering is usually addressed more in the timeline rather than the exposure sheet, but the initial layering is usually set up in the exposure sheet to accommodate drawing issues. In either case this information and the ability to move layers around is a required and synchronized function in both.
Cell usage and exposure by layer by frame
Cells are uniquely named and identified in the exposure sheet. The value of naming cells so they can be uniquely identified is very important particularly to the human aspects of the TBS user interface. It allows you, the animator, to quickly find and swap or reuse cells. Software that only has a timeline is of no value when it comes to quickly finding and identifying cells. If you ever tried to build a cycle and or reuse previously created cells whether currently in use or not on the timeline it is slow, tedious and painful. But by using uniquely named cells and their thunbnails working in the x-sheet makes this a breeze. TBS has several other aids for cell handling and they are really sweet and they all stem from the unique naming of every cell. We will explore these in future articles. But needless to say it is much easier to work on specific character animation action timing using the exposure sheet VS the time line. The exposure sheet is more oriented to character animation while the timeline is more oriented to composite animation and editing. The big exception here is that puppet manipulation is more timeline oriented because like complex special effects and camera moves puppet animation is based on keyframing parameters. Totally a creation of the computer world so not really an evolution from photographed animation.
Thumb nail sketches, notes, and ideas for actions by frame
Again this is an exposure sheet function; it is easy to tie notes to elements, and to cells within elements down to the frame instance of the usage of a unique cell. Animators typically work in multiple sessions on creating an animation so making notes to remind yourself or someone who is collaborating on the animation with you is really great.
Camera field size and movement instruction by frame, Transition effects by frame, Pantograph instructions and registration peg bar movements by frame
Traditionally the photographing of the animation was a really tedious and labor intensive part of the process. The camera person literally had to do almost everything by hand frame by frame. And every single instruction for how each frame was to be composed and photographed down to the minutest detail had to be recorded and communicated step by step through the workflow. So that by the time the scene was to be filmed there was no room for questions or errors. In computer rendered animation the “camera person” is the computer itself, the render engine. So all those hand written instruction for how to set up and shoot each and every frame which were traditionally detailed on the x-sheet still have to be recorded and communicated to the “camera person” the computer. But you can’t easily type instructions to direct a computer unless you are a computer programming expert so an instruction recording and communicating interface had to evolve from the traditional x-sheet and that frame by frame interface did evolve as the timeline. In future articles we will explore how all this information is recorded and communicated through dynamic elements like pegs. And if you have never seen a pantograph before it is what computer animation refers to as a motion guide.
That’s plenty for this time, more to come later.
Labels: Animation Project, Cell Layer Ordering, Exposure Sheet, Fundamentals, Timeline
